Our products
-
Information: How to Install a Mercedes Sprinter Body Kit: Step-by-Step Overview
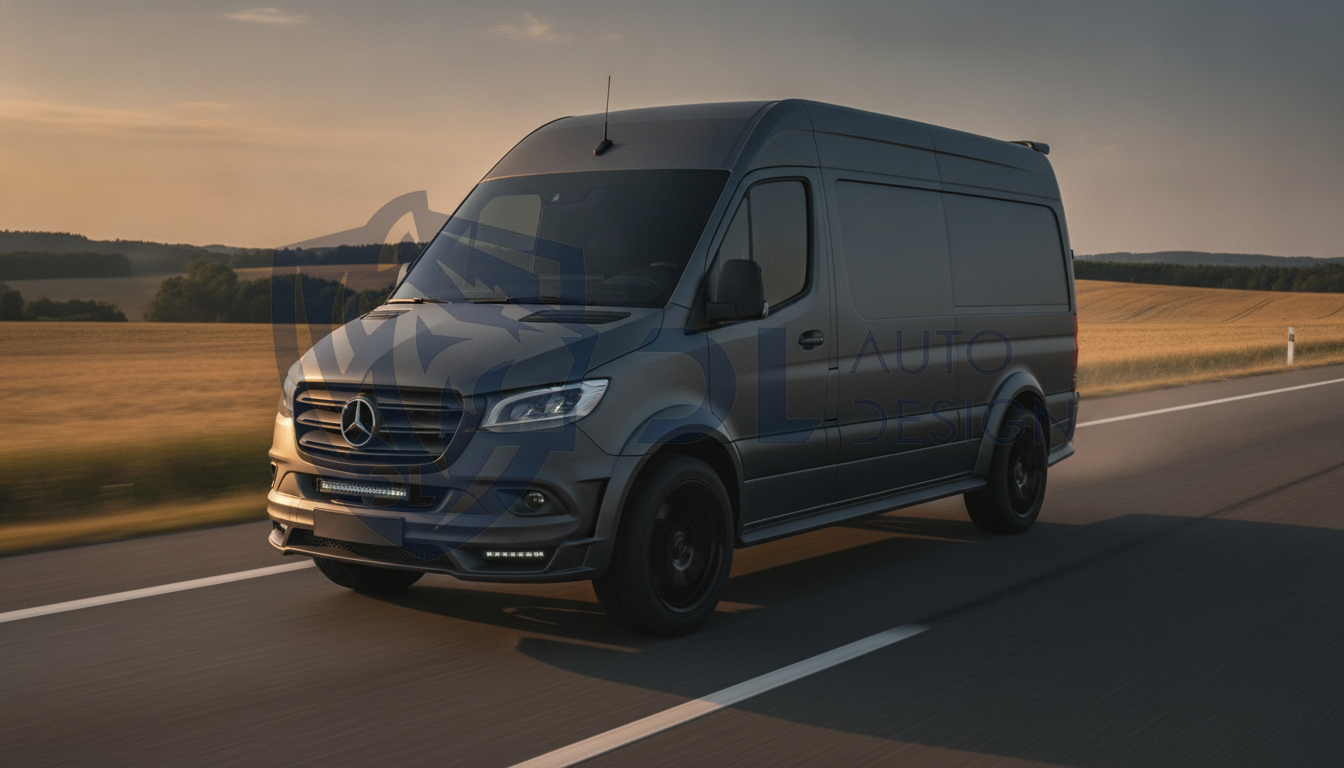
Installing a Mercedes Sprinter body kit requires correct part selection by generation (W906, W907/VS30, or W910), careful removal of OEM components, sensor and ADAS integration, and proper paint preparation before final fitment. We at DL Auto Design manufacture and ship these parts worldwide, so this guide combines real production knowledge with practical installation steps to help you get a clean, lasting result on your 2006-2025 Sprinter.
Step 1: Confirm Your Generation and Wheelbase Before Ordering
The single most common installation mistake is ordering parts designed for the wrong platform. Mercedes Sprinter body kits are generation-specific: W906 covers 2006-2018, W907 (sold in the US as the VS30) covers 2018 to present, and W910 is the all-wheel-drive variant sharing many W907 body lines. A W907 front bumper will not mount onto a W906 without modification, and vice versa.
Wheelbase also matters for side skirts, side sills, and full body kit packages. Sprinters are produced in L1 (standard), L2 (medium), L3 (long), and L4 (extra-long) wheelbases. Always match the skirt or sill length to your van's wheelbase before placing an order. We list fitment details on every product page to remove guesswork.
Check the data plate inside the driver door jamb for the model designation and production year. If your van received a facelift mid-cycle, the front fascia shape may differ from early production units, which affects bumper and grille compatibility.
Step 2: Gather Tools and Prepare the Work Area
A professional Sprinter body kit installation does not require a lift, but a flat, level surface with good lighting is essential. Collect these tools before you begin:
- Trim removal tools and panel pry bars (plastic preferred to avoid paint damage)
- T20, T25, and T30 Torx drivers or a socket set with Torx bits
- 10 mm and 13 mm sockets for bumper mounting bolts
- Drill with step bits for any new fog light or sensor hole cutting
- OBD-II scanner if your van has active parking sensors or ADAS cameras
- Masking tape and a soft cloth for protecting painted surfaces during removal
- Thread-locking compound and fresh OEM-spec hardware where applicable
Lay out all kit components on a clean surface and compare them against the packing list. ABS plastic parts and fiberglass/FRP parts each have slightly different handling requirements. ABS is more flexible and impact-resistant; FRP is stiffer and requires more care during storage and transport to avoid cracking at thin sections.
Step 3: Remove the OEM Front Bumper (W907 Example)
The W907 front bumper removal process is straightforward but benefits from a helper to support the bumper as it releases. Work in this order:
- Open the hood and remove the two upper bumper retaining bolts located near the headlight housings on each side.
- From underneath, remove the lower splash guard screws and the two lower bumper bolts on each side of the lower valance.
- Pull the front wheel arch liners back just enough to access the two side push-pin retainers on each fender edge.
- Disconnect the wiring harness connectors for front parking sensors (typically two on each side for W907), the front camera on MBUX-equipped vans, and any fog light plugs.
- Slide the bumper forward and away from the vehicle with your helper supporting the center.
Label every connector with masking tape and a marker before disconnection. W907 vans built from 2019 onward frequently include a front-facing camera for Active Brake Assist. This camera mounts in the grille area, not inside the bumper, but its wiring routes through the bumper cavity and must be carefully managed.
If you are fitting one of our sport or facelift-style bumpers that includes pre-cut sensor holes, the OEM sensor pods transplant directly. Our Mercedes Sprinter W907 Sport Front Bumper is designed with parking sensor apertures and fog light provisions already formed into the mold, which eliminates field cutting on a finished part.
Step 4: Handle Parking Sensors and ADAS Components Correctly
Modern W907 and W910 Sprinters can carry multiple driver-assistance technologies that live in or near the front bumper: ultrasonic parking sensors, a forward camera, a long-range radar module, and sometimes a night-view sensor. Each has its own mounting point and sensitivity to misalignment.
Ultrasonic parking sensors must be flush with the bumper face. If a new bumper positions them even 2-3 mm proud or recessed, false warnings or dead zones appear. Our ABS parts are molded with sensor collars at the correct depth to match the OEM sensor body diameter.
The forward camera on MBUX W907 vans is usually grille-mounted. When fitting a new grille, confirm the camera aperture position in the new part before installation. A misaligned camera requires recalibration with a Mercedes-Benz XENTRY or compatible diagnostic system. If you are unsure whether your van has a forward camera, check the option sticker in the B-pillar or the original order documentation.
Rear parking sensors on the W907 follow a similar process. The OEM rear bumper typically carries four sensors in a horizontal line. Our replacement rear bumpers maintain this sensor line geometry so existing sensor pods transfer without redrilling.
Step 5: Test-Fit Before Painting
Never paint a body kit part before test-fitting it on the vehicle. This rule applies whether you ordered an unpainted ABS part or a raw fiberglass panel. Test-fitting reveals any minor gap or alignment issue that is easy to address on bare material but extremely difficult to correct on a painted surface.
Offer the part up to the vehicle with all mounting points loose. Check the gap between the new bumper or skirt and the adjacent body panels. A consistent 4-6 mm gap along a bumper-to-fender seam is acceptable and matches OEM tolerances. Gaps wider than 8-10 mm or uneven taper along a joint usually indicate a mounting tab that needs slight adjustment or a shim washer at one bolt point.
For fiberglass parts, minor flex adjustments are possible by applying gentle heat with a heat gun on the reverse face while holding the desired shape. ABS parts respond similarly but require less heat. Do not over-heat either material or the surface will distort permanently.
Step 6: Paint Preparation and Finishing
All DL Auto Design parts ship in either primer-ready bare ABS, raw fiberglass, or fully painted finish. If you ordered an unpainted part, the paint preparation sequence is:
- Sand the entire outer surface with 320-grit wet-and-dry paper to remove mold release agent and create a mechanical key.
- Wipe the part with a panel wipe solvent (isopropyl alcohol or dedicated prep solvent) and allow full evaporation.
- Apply a high-build plastic primer in two to three thin coats. On fiberglass parts, a dedicated epoxy primer improves adhesion significantly.
- Block sand the primed surface with 600-grit paper, then apply a fine surfacer coat and re-sand with 800-grit before basecoat.
- Apply basecoat in your factory color code (found on the data plate, usually listed as a three-character color code for Mercedes), then clear coat to match the factory gloss depth.
If you ordered a pre-painted part matched to your color code, inspect it on arrival before installation. Our factory-matched paint is applied in a controlled booth environment, but transport vibration can occasionally cause contact marks on packaging. Report any transit damage before fitting.
Step 7: Final Installation and Torque
With paint cured and dry for at least 48 hours, install the part using the reverse of the removal sequence. Torque bumper mounting bolts to approximately 20-25 Nm for the main structural bolts and finger-tight plus a quarter turn for plastic tab screws. Over-tightening plastic tabs cracks them; under-tightening causes rattles and misalignment over time.
Reconnect every sensor and lighting connector and confirm each clicks fully home. Restore the wheel arch liners with new push pins if the originals were damaged during removal. Push pins cost very little and prevent the liner from flapping against the new part at highway speed.
If you also fitted a new grille, our W907/W910 Full Body Kit with Diamond Front Grille integrates a matching grille into the full kit so you achieve a cohesive look without sourcing parts from multiple suppliers.
Step 8: Post-Installation Checks
After installation, perform these checks before returning the van to service:
- Start the engine and verify no fault codes are stored for parking sensor, camera, or lighting circuits using an OBD-II scanner.
- Test all parking sensors in a slow maneuver toward a solid obstacle to confirm range and warning sequence.
- Inspect the bumper-to-fender gap on both sides with the van on a flat surface; gaps should be even and consistent.
- Check that the hood closes fully without contacting the new bumper edge.
- Inspect underneath for any harness or coolant pipe contact points against new body parts.
- On vans used in EU member states, consult your national type-approval authority regarding modification registration. Many of our parts carry TUV certificates, which simplify this process in Germany, Austria, Switzerland, and neighboring markets.
Material Comparison: ABS vs Fiberglass for Sprinter Body Kits
Property ABS Plastic Fiberglass / FRP Impact resistance High - flexes on minor impact Lower - may crack on hard impact Weight Moderate Light Paint adhesion Good with plastic primer Excellent with epoxy primer Fitment precision Very high - injection molded High - hand-laid, slight variation TUV certification Available on select parts Available on select parts Best for Commercial and daily-use vans Show vehicles and custom builds Shipping, VAT, and Customs for US and EU Buyers
We ship from Lithuania throughout the European Union and worldwide. EU buyers pay standard VAT at checkout. Non-EU buyers, including customers in the United States, United Kingdom, Canada, and South Korea, pay 0% VAT on their order, which often offsets a significant portion of import duties. US Sprinter owners importing body kit parts typically face a 2.5% import duty on plastic automotive parts under HTS code 8708.29, though we recommend confirming current rates with a licensed customs broker before ordering.
Bumpers and full body kits ship as oversized freight, not standard parcel post. Dimensions and weight vary by part, and we provide accurate crate measurements so you or your freight forwarder can obtain an accurate delivery quote. Most EU orders arrive within 3-7 business days via road freight. Transatlantic freight to US ports typically takes 10-21 days depending on the service level selected.
Frequently Asked Questions
Can I install a Sprinter body kit at home without a lift?
Yes. Front bumpers, grilles, side skirts, and rear bumpers can all be installed on a flat driveway with basic hand tools. You need a jack and axle stands only if the vehicle's wheelbase or ground clearance makes accessing the lower mounting bolts difficult. A second person is helpful for supporting the bumper during removal and refitting.
Will a W907 body kit fit the US VS30 Sprinter?
Yes. The VS30 is the North American market designation for the W907 platform. DL Auto Design W907 parts fit VS30 Sprinters from 2019 onward. Always confirm your exact model year because 2019 and post-facelift 2022-plus front ends use slightly different bumper clip and sensor positions.
Do I need to recalibrate parking sensors after fitting a new bumper?
If the new bumper positions the OEM sensor pods at the same depth and location as the original, no recalibration is needed. If sensor depth or angle changes, or if you add sensors to a van that originally had none, calibration with a compatible diagnostic tool is required.
Are DL Auto Design body kit parts TUV certified?
Many parts in our range carry TUV certificates, which makes road registration easier in Germany and other European markets that require type-approval documentation for structural exterior modifications. Check the individual product page for certification details on each specific part.
How long should I wait after painting before installing the part?
Allow a minimum of 48 hours after the final clear coat application before handling and installation. In cooler workshop temperatures below 15 degrees Celsius, extend this to 72 hours. Rushing installation on fresh paint risks permanent finger marks and surface deformation under clamping forces.
Can I fit a W907 body kit onto a W906 Sprinter?
No. W906 and W907 share no interchangeable body panels at the front or rear. The headlight shape, grille aperture, and bumper mounting points are completely different between generations. DL Auto Design offers dedicated parts for both W906 and W907 platforms, so select the correct generation at the time of ordering.
A clean Mercedes Sprinter body kit installation depends on three things done right: correct part selection by generation and wheelbase, careful handling of sensors and ADAS systems during removal and refitting, and proper paint preparation before the part goes on the van. We at DL Auto Design build every kit with installer-friendly fitment and clear sensor provisions so the process is as straightforward as possible for professional bodyshops and capable owner-operators alike. Browse our full range of W907, W906, and W910 fitment parts at dlautodesign.com, and contact us directly if you need fitment confirmation for your specific van configuration before ordering.